My 1st Baking Class!

~ Posted on Monday, August 30, 2010 at 12:45 AM ~

Last Saturday was my 1st baking class conducted by my 1st SIL. She came prepared with her ingredients and equipments (she even brought a spare portable oven in case the one she gave us recently didn't work). The entire lesson last for less than 2 hours and consists of 3 recipes using oven. 

I'm so sorry there are no pictures taken at all because everything is rushed and I also had to quickly scribbled down the instructions that I managed to remember and also pay attention to my SIL (and also watch out for Ben). So before I forget, here are my notes:

1. Roasted Chicken Wings

Seasonings:

* Little bit of honey, soy sauce & thick soy sauce (Can use other types depend on your taste bud)

Instructions:

1. Marinate chicken wings with seasoning ingredients
2. Preheat oven at 190℃ (about 5 minutes will do)
3. Place chicken wings (outer part) onto the aluminium foil on the baking tray.
4. Place baking tray into oven and bake for about 15 minutes
5. After 15 minutes, flip the chicken wings to the other side
6. Glaze the chicken wings with the marinating sauce
7. Bake for another 15 minutes until you see the skin turns golden brown.

2. BBQ Pork (Char Siew)

Ingredients: Pork cut to strips

Seasonings: 1 tsp ginger powder, 1 tsp onion powder, 1 tbsp sesame seed oil, 2 tbsp soy sauce, 2 tsp white pepper, 4-5 tbsp sugar, Lit bit of honey, red coloring & thick soy sauce

Instructions:

1. Marinate the pork strips with the seasonings for overnight OR at least 2 hours before start baking
2. Preheat oven at 190℃ (about 5 minutes will do)
3. Place pork strips onto the aluminium foil on the baking tray.
4. Place baking tray into oven and bake for about 20 minutes
5. After 15 minutes, flip the pork strips to the other side
6. Bake for another 15 minutes.

3. Muffins

Ingredients: Pre-mix muffin pack, 2 eggs beaten, 135ml oil, 135ml water

Instructions:

1. Add in eggs, oil and water with the muffin pre-mix into a large bowl.
2. Stir the ingredients well
3. Fill up the muffin cups half way length
4. Bake for 25 minutes at 190℃
5. After that, add in your own choice of decorative (choc chips, icing etc)

I'm sorry if the instructions are pretty blur and not detail enough. I have tried my best to jot down everything but it's really not easy, especially when your teacher is measuring things based on her rough estimation.

And the muffin recipe, although it's using pre-mix, I was told I should start with easy ready made ingredients to get used to baking. And I'm not experienced at all in writing down recipes so I'm not sure I'm jotting down the right words and baking terms or not :P

I hope to be able to take pictures the next time I start baking on my own!

So there you go, my 1st baking class!

Benefits & How to Create Facebook Page for Your Blog

~ Posted on Sunday, August 22, 2010 at 12:08 AM ~

Finally can't resist and succumbed to the temptation of creating the "I'm a full-time mummy Fan Page" for my blog on Facebook!

It came about when one of my blog reader (Thanks to mamapoekie for the inspiration!) who asked me through her comment whether I have a Facebook page and I replied that I don't think I can handle too many accounts at the moment!

. . . . . (please wait while I put my foot into my mouth)

Okay, okay... I just can't resist it any longer! I thought over the idea of creating the Facebook page and what benefits & good it does for my blog and it came down to these few reasons:

* a great platform for my loyal followers to come together for my website

* gives more footing in search ranking

* able to track the number of interactions my page has with fans, view key demographics like sex, age, and location, and more

* a variety of customization options when choosing to communicate with my fan base

* able to communicate messages and posts directly into my fans’ homepages

* it’s completely free!

* Facebook allows users to Comment, Like & Share any update, link, photo, video etc. This has the opportunity to turn viral depending on the popularity or interest in the subject.

* The process of becoming a fan is simplified – NO friend request to be ‘accepted’ or to view your page. Just the decision to become a fan and at the click of a mouse the avenue of communication is open to you both.

Another article on the benefits:

* Unlike profile and group, both of which are limited with maximum 5000 friends and 5000 members, fan page is unlimited, a fan page can get as many fans as it can

* Fan page can be searched or found by search engine, it is powerful, imagine whatever you post in fan page will be indexed by google,doesn’t it mean more traffic to the page and also target business website or blog?

Now how to create a Facebook page for your blog? I'm just going to put in those steps that I managed to screenshot for your guide, you can actually surfed around the Net for tutorials to do this as well. So here goes:

#1: Login to your Facebook account. If you don't have an account, you need to create one first by going to Facebook home page.

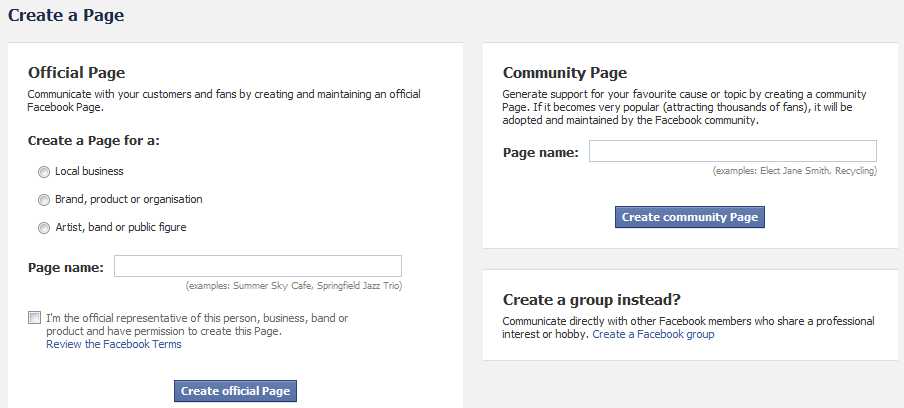
#2: Now go to Facebook | Create a Page option. You will see there are 2 page options to choose from, "Official Page" or "Community Page". Choose the one on the left.

Facebook Create Page

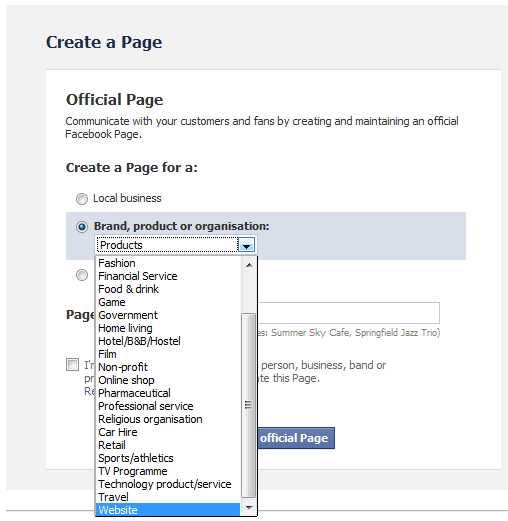
#3: Select the 2nd option which is "Brand, product or organisation" and look for "Website".

Facebook Create Page

#4: Key in your page name. In my case, of course I key in my blog name which is "I'm a full-time mummy".

#5: Check the box under "I'm the official representative of this person, business, band or product and have permission to create this Page." and click the "Create Official Page" button.

#6: From there onwards, you will be prompted to add your info, such a picture for your page profile, basic and detailed info and so on.

Now what good is a fan page if you can't import your blog RSS into it right? Honestly, I'm kinda tired having to copy my posts link to my personal Facebook profile whenever I publish a new post. So, doing this especially under my own blog profile is good for me!

Option 1: Via Facebook Notes

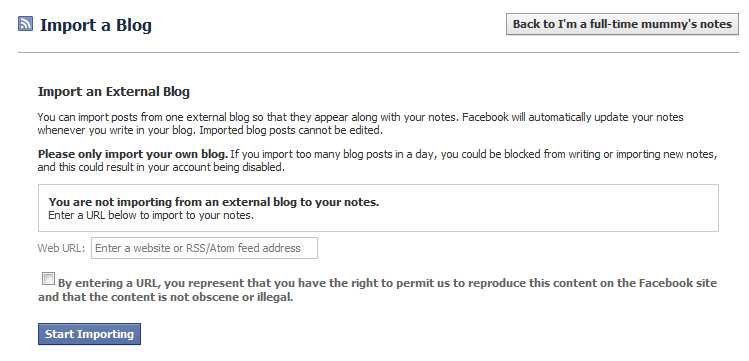
#7: Now, what you do is go to "Edit Page", look for "Notes" and click at the "Edit" option. Look out for the option to "Import a Blog" and key in your blog URL. Check the box at the end before clicking on the "Start Importing" button. (I actually have to search around for more tutorials as it cannot detect my RSS link and I finally found the solution which is to just key in my blog URL)

#8: If your URL is correct, you will see the preview of your imported blog. Just click at the "Confirm Import" button.

Import a Blog into your Facebook Page

Option 2: Via NetworkedBlogs on Facebook (** FYI, I USED THIS OPTION!)

A note of thanks to a bloggy friend, MieVee for highlighting the differences between these 2 options. I'm using the 2nd option  based on this tutorial after MieVee's tips and we'll see how it works out when my next post is up!

Of course, the final step is to "Like" your own fan page and then start spreading the news that you have your own Facebook page now!

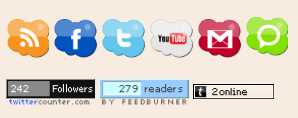
For me, I added a new social icon on my blog sidebar so that you guys can just click on the button (2nd from left) to follow "I'm a full-time mummy Fan Page".

Social Icons

Hope the above tutorials help!

Now come and start liking "I'm a full-time mummy Fan Page" already!

See you in Facebook! 

I'm a full-time mummy

Redirect Your Blogger URL to your own new URL

~ Posted on Tuesday, August 3, 2010 at 11:46 PM ~

Oh wow! Maybe it's just me not being aware of such features until few minutes ago, but I just learned a new thing today!!

You see, ever since I moved out from Blogger to my own domain here, I do still keep the old blog in Blogger running (as in I still go to the Dashboard and check out those blogs I followed) but I don't publish anymore posts in Blogger.

Now what did I learn you ask? You see, I have no idea there is this feature we can put in to inform Google to redirect the blog's URL to our new domain URL! (*Smack head!*) I've always wondered how do I tell my blog readers and visitors to go to my new blog domain now instead of still going to the old blog in Blogger but I never realised there is this feature until now!

Look and read below for better understanding and how to go about doing it:

1. Login to your Blogger account. Go to Dashboard

2. Go to "Settings", click at "Publishing".

3. Click at "Custom Domain" - opt for "Advanced Settings"

4. Key in your new domain URL and check at the box underneath (which says Redirect something.com to www.something.com)

5. Enter the word verification code and your settings will be saved!

6. From here onwards, everytime someone tries to go to your old Blogger URL, they will be prompted with the "Redirect" message screen.

Hope the above screenshots & guides help!

(*Note: I did not set the above for my old blog in Blogger as I still want to refer to some of the old posts I have there so the above tutorial is written just in case one day I decide to officially stop directing anyone to my old posts in there...)