I've recently shared with you guys my new hobby that is very therapeutic for myself, the Do-It-Yourself (aka DIY) ribbon hair clip!
So here goes a simple ribbon hair clip tutorial in case you are interested...
What you will need:
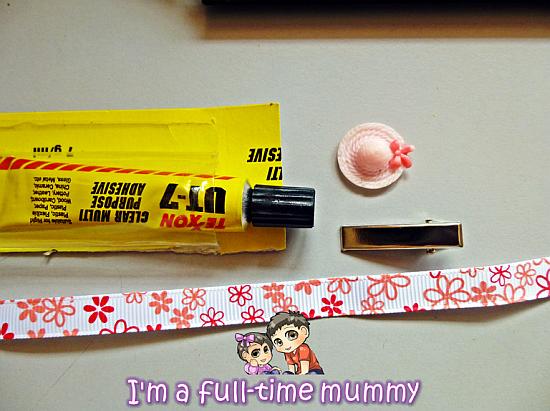
* Alligator hair clip (I bought mine from an online store) - the size I used is 6mm width by 3cm length (my ninja girl's hair not that long yet...)
* Ribbon (I use 3/8″ grosgrain as recommended by my craft guru)
* Scissors
* Craft glue (I used a China brand el-cheapo craft glue)
* A cigarette lighter and candle to seal the ends of the ribbon
Steps to follow:
* Start with a hair clip and a ribbon.
* Seal the ends of the grosgrain ribbon. I use a lighter, light up the candle (I'm scared of heat so prefer to use candle) just hold the ribbon's ends the flame near (not touching!) for a few seconds.
* Start from the inside of the clip, near the joint and glue the ribbon down. I will use extra clips to secure it tighter.
* Then put glue on the underside of the bottom ‘jaw’ of the clip and fold your ribbon under, pressing and smoothing it onto the clip.
* Just continue gluing all over the hairclip until it is all covered up by the ribbon.
* I also glue the inside of the jaw clip area to make it look professional hahahah...
* You may add on appliques or decorations on top of your hair clip to make it more outstanding or unique.
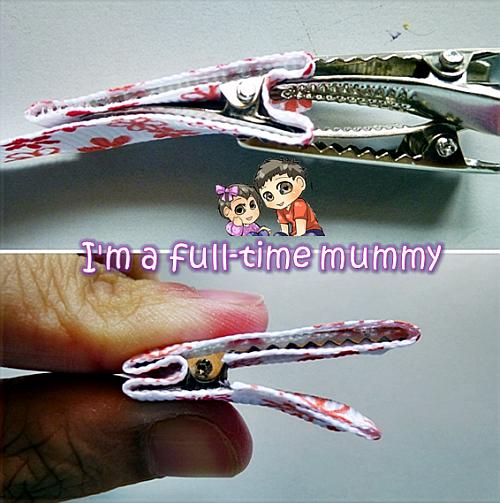
The results...

I hope you can understand my tutorial, wish I could provide step by step pictures but the glue dries up fast and the clip is very small that it is very tiring for me to be holding it open long enough for me to snap pictures so I just randomly take the pictures.
Until then, I hope to be able to make more awesome ribbon hair clips for my children. Feel free to share your personal tips if you are into ribbon hair clips making as well!
