Chinese New Year (aka CNY) is coming in a few weeks time! Few days earlier, I was inspired with this photo I saw on my cousin in-law's house. She homemade this very pretty lantern and hung it in her house and I was like 'oh man... I want one of those too!' But reality check... I don't think I could try that out so fast (cos it requires 30 pieces of red packets to do it) and I really don't want to waste that many red packets in my 1st attempt, so I Googled around and found some ideas to experiment.
Here goes my DIY Chinese New Year Lantern Style #1:
What you need is: 8 pieces of red packets (or what we Chinese called 'Ang Pows'), stapler, scissors, cellophane tape and a piece of string.
 Take 1 red packet, ensure the front is facing you, fold in the 2 top corners until they meet. Repeat with the bottom & for the other 7. Take 1 red packet, ensure the front is facing you, fold in the 2 top corners until they meet. Repeat with the bottom & for the other 7.
|
 Take 4 of the red packets, arrange them with the folded edges & staple the corners together. Repeat with the other 4 red packets. Take 4 of the red packets, arrange them with the folded edges & staple the corners together. Repeat with the other 4 red packets.
|
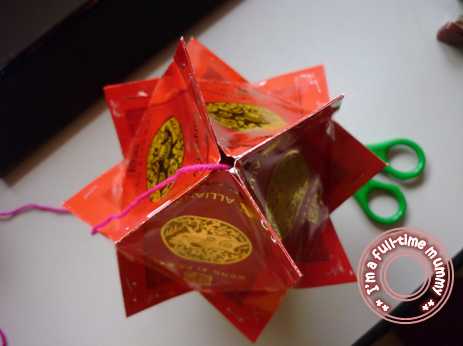
 WIth both the top & bottom of the lantern, line up the folded edges & staple them together. WIth both the top & bottom of the lantern, line up the folded edges & staple them together.
|
 Don't worry if your lantern looks weird, Don't worry if your lantern looks weird,
they will eventually close up together.
|
 I actually use the cellophane tape to closethe gaps in between the edges of the red packets. I actually use the cellophane tape to closethe gaps in between the edges of the red packets.
|
 If you want, you can put in a string through thehole so that you can hang the lantern! If you want, you can put in a string through thehole so that you can hang the lantern!
|
The results? TADAAAAAAA!!!

Stay tuned as I will post another style of making this lantern soon! Hope you enjoy my simple tutorial!
